
In Linux computing, understanding your system’s Graphics Processing Unit (GPU) specifications is crucial for optimizing performance, especially in gaming and professional applications that demand high graphical processing power. Whether you’re troubleshooting, monitoring performance, or simply curious about your system’s capabilities, knowing how to check GPU on Linux can provide valuable insights. Linux supports a wide range of tools tailored for GPUs from leading manufacturers such as Nvidia, AMD, and Intel, offering users flexibility in managing and diagnosing their hardware.
Table of Contents
Understanding GPU Basics on Linux
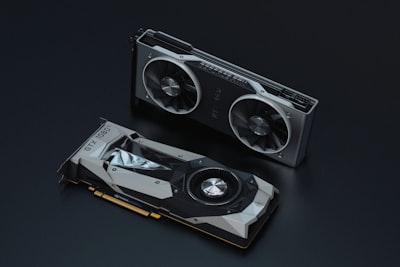
A GPU, or Graphics Processing Unit, is an essential component in computing that accelerates the rendering of images, videos, and animations. It plays a pivotal role in Linux systems, not just for gaming and graphic design, but also in computational tasks that benefit from parallel processing. GPUs can be categorized into two main types:
- Integrated GPUs are built into the CPU and share memory with the processor, offering a cost-effective solution for basic computing tasks.
- Dedicated GPUs stand apart from the CPU and come with their own memory (VRAM), delivering superior performance for intensive graphical and computational workloads.
Linux users have access to GPUs from various manufacturers, each offering unique features and capabilities:
- Nvidia: Known for high performance and support for the latest graphics technologies.
- AMD: Offers competitive performance with excellent open-source driver support.
- Intel: Provides integrated GPUs that are ideal for everyday computing tasks.
Understanding the differences between these GPUs and their roles in Linux systems is the first step towards leveraging their full potential.
Preparing Your Linux System for GPU Monitoring
Before diving into GPU monitoring and diagnostics, it’s essential to prepare your Linux system to ensure accurate readings and compatibility. Follow these steps to get started:
- Update Your System: Ensure your Linux distribution is up-to-date to have the latest drivers and software support. Use your package manager to update your system, for example,
sudo apt update && sudo apt upgradefor Debian-based systems. - Install GPU Drivers: Make sure you have the correct drivers installed for your GPU. Nvidia and AMD provide proprietary drivers that can be installed from their websites or through your Linux distribution’s package manager. Intel GPUs typically work out of the box with open-source drivers.
- Install Dependencies and Tools: Various tools and utilities require specific dependencies. Installing packages such as
mesa-utils,lshw, andglxinfocan be beneficial. Use commands likesudo apt install mesa-utils lshw glxinfoto install these utilities on Debian-based distributions.
By ensuring your system is up-to-date and equipped with the necessary drivers and tools, you’re now ready to delve into GPU monitoring and diagnostics on Linux.
Command-Line Tools for GPU Monitoring
lshw and lspci Commands
To check GPU on Linux, the lshw and lspci commands are invaluable. Use sudo lshw -C display to list detailed information about all display adapters, including the GPU model and driver. For a broader overview, lspci -v scans the system’s PCI devices, highlighting the GPU among them. These commands provide a quick snapshot of your GPU’s hardware specifications, aiding in troubleshooting and system audits.
glxinfo for Detailed OpenGL Information
For those needing detailed information about the OpenGL capabilities of their GPU, glxinfo is the tool of choice. Executing glxinfo | grep -i device in the terminal reveals the OpenGL version, renderer, and vendor, offering insights into the graphical performance capabilities of your Linux system. This command is particularly useful for developers and professionals working with graphics-intensive applications.
Using glmark2 for GPU Stress Testing
glmark2 is a benchmarking tool that stress-tests the GPU under various conditions to evaluate its performance. Installation is straightforward with package managers, e.g., sudo apt install glmark2 for Debian-based systems. Running glmark2 initiates a series of tests, outputting scores that reflect the GPU’s capabilities. Analyzing these scores helps in comparing performance across different systems or configurations.
Monitoring Real-Time GPU Usage with gpustat and nvidia-smi
For real-time monitoring, gpustat and nvidia-smi offer comprehensive insights. gpustat, akin to top for GPUs, provides a snapshot of the GPU’s current state, including utilization and temperature. It’s particularly useful for Nvidia GPUs and can be installed via Python’s package manager. Nvidia users can also leverage nvidia-smi for a detailed report on GPU usage, temperature, and other critical metrics, making it an essential tool for performance monitoring and troubleshooting.

GUI Tools for Easier GPU Monitoring
Graphical tools like GpuTest and HardInfo simplify GPU monitoring with user-friendly interfaces, ideal for those less comfortable with the command line. GpuTest offers a suite of stress tests and benchmarks to assess GPU performance visually, while HardInfo provides a comprehensive system overview, including GPU details. These tools are particularly beneficial for beginners or users who prefer graphical over textual information, offering an accessible way to monitor and evaluate GPU performance on Linux systems. Their intuitive interfaces and detailed reports make understanding and diagnosing GPU performance more straightforward, catering to a wider audience of Linux users.
FAQs
How do I find out what GPU I have in Linux?
To identify your GPU model in Linux, you can use the lshw -C display or lspci | grep VGA commands in the terminal. These commands provide information about your GPU make and model.
Can I monitor GPU temperature in Linux?
Yes, you can monitor GPU temperature using tools like nvidia-smi for Nvidia GPUs, which displays temperature among other details. For AMD GPUs, the sensors command from the lm-sensors package can be used.
What is the difference between lspci and lshw commands for GPU checking?
lspci lists all PCI devices, including the GPU, and provides a brief overview. lshw -C display, on the other hand, offers detailed information specifically about the display adapter, including the driver in use and resources.
How can I test my Linux GPU performance?
You can test GPU performance using benchmarking tools like glmark2 for general performance testing and GpuTest for stress testing and graphical benchmarks.
Is there a way to monitor GPU usage in real-time on Linux?
Yes, tools like gpustat and nvidia-smi allow for real-time monitoring of GPU usage, including metrics like utilization and memory usage.
Can I use these tools for any GPU brand?
Most tools mentioned, such as lshw, lspci, and glxinfo, are brand-agnostic and work with any GPU. However, some tools like nvidia-smi are specific to Nvidia GPUs. Always check tool compatibility with your GPU brand.
Understanding and monitoring your GPU’s performance on Linux is crucial for ensuring optimal system operation, especially for tasks that demand high graphical processing power. With a variety of command-line and GUI tools available, users can easily check their GPU’s status, monitor its performance, and diagnose issues. Whether you’re a gamer, a professional in graphics-intensive fields, or simply a Linux enthusiast, exploring these tools can significantly enhance your system’s performance and your overall experience. Encouraged by the flexibility and power of Linux, users should feel empowered to delve into the world of GPU monitoring and optimization.